DIY Plumbing Fixes for Beginners
Beginner DIY plumbing fixes for drips, slow drains, and toilet flappers, with tools, stop conditions, and when to call a licensed plumber before you start.

- Find the shutoff before you touch a wrench. A repair you can stop is safe; one you cannot is an emergency.
- Four beginner jobs cover most household drips: a faucet cartridge, a sink trap, a toilet flapper, and a supply-line check.
- Gas, sewage, electrical work, water heaters, and leaks inside walls belong to a licensed plumber.
On a quiet Saturday the bathroom sink begins a rhythm: drip, pause, drip. By Monday someone has tightened the handle hard enough to strip the screw. The leak was never about force; a worn part needed a wrench, a bucket, and a valve turned the right way.
Plumbing has a reputation for mystery or expense. In practice, a short list of fixture-level repairs is within reach of an adult with patience. The list has edges, and they matter more than the tools.
This guide covers four jobs behind many household calls: a dripping faucet, a slow drain, a running toilet, and a supply-line check. The goal is not to become a plumber. It is to fix small problems cleanly and to recognize the ones that belong to someone licensed.
Before the first turn: shut off the water
Every repair here begins at a valve. Before removing a part, find the shutoff for that fixture: an oval handle under the sink, a valve behind the toilet, or the main valve where water enters the house. Test each one now, while nothing leaks, so you know it turns.
The main valve is usually near the meter, in a basement, closet, or crawlspace; in an apartment, look under the kitchen sink and ask the manager. Tag it. In an emergency, nobody should have to guess.
After closing the valve, open the faucet to release pressure. Put a bucket under the work area and plug the drain with a rag. A headlamp keeps both hands free.
Four jobs sit outside the beginner zone. Gas comes first: never open or cap a gas connection, and if you smell gas, leave and call the utility from outside. Electrical work is second: do not open a water heater, pump, or wiring, and stop if water is near an outlet or panel.
Sewage is third. Water rising from a floor drain, a toilet overflowing with waste, or a strong sewer smell means a drain-line problem. Do not keep flushing, and do not add chemicals; call a licensed plumber. Major leaks are fourth: a spraying pipe or a bulging ceiling earns a shutoff and a call.
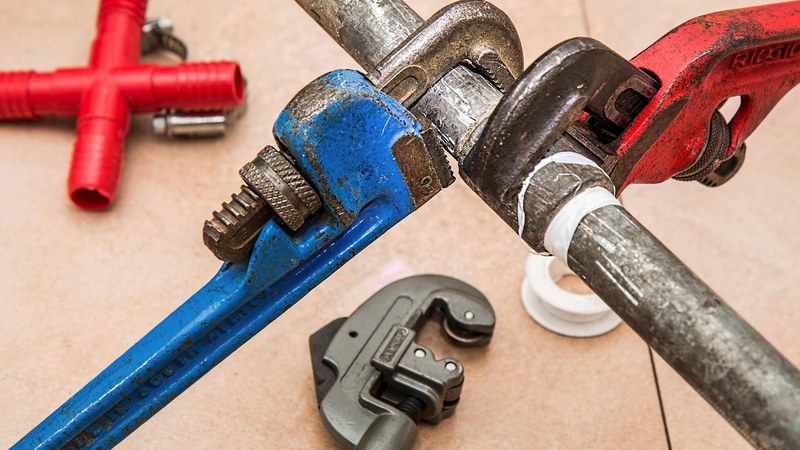
The tool list is shorter than the store shelf suggests: an adjustable wrench, a basin wrench, screwdrivers, pliers, PTFE tape, a bucket, rags, gloves, a headlamp, a cup plunger, and a hand auger. Buy parts after you hold the old ones, and skip chemical drain cleaners, especially with children and older pipes.
A dripping faucet usually needs one small part
A faucet dripping from the spout is losing water past a worn seal, not failing as a fixture. Single-handle models usually use a cartridge; two-handle models often use compression washers. Check the model, or take the part to a store and match it.
Shut the fixture valves, open the faucet, and plug the drain. Pry off the handle cap, remove the screw, and lift the handle. Under it sits a retaining nut or clip; remove that and pull the cartridge out. Photograph its orientation first.
Install the new part with its O-rings. Wrap PTFE tape clockwise on threaded pipe connections, not on a cartridge that seals with O-rings. Open the valves slowly and watch for dampness underneath.
A single-lever bathroom sink is a fair first project. The first attempt may take forty minutes because the space is dark and the clip is awkward; the second takes fifteen.
Stop if the handle will not come free, the valve body is cracked, corrosion has fused the parts, or the faucet still drips after a correct swap. A wall-mounted faucet without its own shutoff is also a place to stop and call.
A slow drain is a trap problem until proven otherwise
Ask one question first: is the drain slow in one place or several? One sluggish sink, tub, or shower usually means a local clog in the trap or the pipe behind it. Several slow drains, gurgling, or backups elsewhere point to a main line.
For a single sink, work under the cabinet. Put the bucket under the P-trap, unscrew the slip nuts, and lower the trap slowly; expect standing water. Clean the trap and the arm into the wall, check the washers, and reassemble. Hand-tight plus a small turn is enough; overtightening cracks plastic.
If the trap is clear, use a cup plunger and block the overflow with a wet rag so pressure can build. A hand auger can pull out hair the plunger only moves. Feed it slowly and stop at resistance; forcing it can damage an older pipe.
Chemical cleaners are the part of this job to skip. They are caustic, risky around children, hard on older pipes, and ineffective against a fully blocked line. If one has already failed, the next step is a plumber.
A bathroom sink holding two inches of water after tooth brushing is a common scene: the trap is packed with hair and toothpaste, and the fix takes twenty minutes. Kitchen grease coats the pipe farther down, so scraping plates prevents more clogs than any tool.
Call a plumber if the water smells like sewage, several fixtures drain slowly, a tub fills when the toilet flushes, the same drain clogs repeatedly, or water stains the ceiling below. Those point to a main line or vent problem.
Most plumbing failures give notice first: a damp cabinet floor, a stiff valve, a bulging hose. The schedule generator builds a weekday cleaning frame from your household size and free minutes. Add one monthly line for a five-minute check under each sink.
A running toilet is a flapper conversation
A toilet that refills every few minutes, or hums long after a flush, is often losing water past the flapper at the bottom of the tank. The rubber seal lifts on a flush and drops back to close the opening. Mineral buildup, age, and tank additives can keep it from seating. The part is cheap; the water bill is not.
Shut the valve behind the toilet, flush once to empty the tank, and sponge out the rest. Unhook the chain, slide the flapper off its pegs, and match the size at the store. Install the new one, hook the chain with half an inch of slack, and turn the water on.
Test with two or three flushes. A chain that is too tight holds the flapper open; one that is too long catches underneath and keeps it from sealing. If the water level sits above the overflow tube, adjust the fill valve so the tank stops before it spills.
Stop if the tank is cracked, water appears at the base, or the floor stays damp after the tank is stable. Water at the base can mean a failed wax ring or flange, which requires lifting the toilet. A shutoff that will not close, or a fill valve that will not stop running, also calls for a plumber. Condensation outside the tank is not a leak; dry it and watch.
| Fix | What you touch | Time | Stop and call if |
|---|---|---|---|
| Faucet drip | Cartridge or washer | 20–45 minutes | Handle seized or body cracked |
| Slow sink | Trap, plunger, auger | 20–30 minutes | Sewage smell or several slow drains |
| Running toilet | Flapper and chain | 15–30 minutes | Cracked tank or water at the base |
| Supply line | Visual check, hose swap | 5–15 minutes | Leak you cannot shut off |
Check the supply lines, then respect the wall
The most valuable habit is a five-minute look, not a repair. Once a month, open the cabinet under each sink and check the supply lines and shutoff. Look for damp wood, white or green crust, a bulging or kinked hose, and a seized valve. The area behind the toilet and washer deserves a glance.
Braided stainless hoses resist bursting better than older rubber ones. Many manufacturers print a replacement interval on the hose; follow it. Write the installation date on the new hose so the next check has a reference.
Exercise quarter-turn valves once or twice a year by closing and opening them gently. A valve that never moves can seize open, turning a small repair into a utility call. If one is stiff, do not force it.
Memorize the stop list: water you cannot shut off, sewage backup, gas odor, electrical involvement, water heaters, pumps, leaks inside a wall or ceiling, frozen or burst pipes, and any job that needs soldering or an open wall. Those need a licensed plumber, and often a permit.
When you call, have three facts ready: the fixture, where the water appears, and whether the shutoff works. Shut the water off before the plumber arrives if you can, and photograph the area. Leave the fixture assembled; a clear starting point helps more than loose parts.
The most useful plumbing skill is not tightening a fitting harder. It is recognizing the moment when the right move is to stop and call.
Diy Plumbing Fixes For Beginners FAQ
Do I have to shut off the main water for every repair?
No. Most fixture repairs use the small valve under the sink or behind the toilet. Use the main only when that valve is missing, broken, or will not close. Open a faucet afterward to release pressure, and keep a bucket ready.
Are chemical drain cleaners a good shortcut?
No. They are caustic, risky around children, and can damage older pipes. They also complicate the job for a plumber later. A plunger, trap cleaning, and hand auger cover most single-fixture clogs.
How can I tell a sink clog from a main line problem?
One slow fixture usually means a local clog. Several slow fixtures, gurgling, sewage odor, or water rising in one drain when another is used point to the main line. Stop and call a licensed plumber.
Is replacing a toilet flapper safe for a beginner?
Yes, for a standard tank with a working shutoff. Shut off the water, empty the tank, match the flapper, and test with a few flushes. If the tank is cracked or water appears at the base, stop and call.
Pick one fixture this weekend and do the five-minute check: shutoff, supply line, trap, and the floor underneath. Fix the small thing you find, or write it down for a licensed plumber. Put the monthly check into the schedule so the next drip is caught while it is still a drip.
For more maintenance routines that fit a family schedule, browse our home systems and fixes guides, and build the monthly check into your week with the Cleaning Schedule Generator.
Daniel Reyes spent ten years in residential maintenance before moving into writing. He covers seasonal upkeep, cleaning systems, stain removal, and the repairs homeowners can safely handle themselves, with clear notes on when to stop and call a professional.