Lunchbox Packing Station Ideas
Build a lunchbox packing station that kids can use: layout, bins, a simple checklist, and food-safety basics for school lunches. A ten-minute setup.

- Put the lunch station on the counter between the refrigerator and the door. An extra cabinet door is where mornings stall.
- Sort supplies by job, not by food group: one bin for boxes, one for dry snacks, one for tools, one for cold packs.
- A picture checklist at kid height lets a seven-year-old pack most of the box and still reminds everyone about the ice pack.
It is 7:20 on a Wednesday. One child holds a container with no lid, a second has abandoned an open yogurt cup, and the counter is a layer of bags, wrappers, and a lonely apple. Nobody is being difficult. The supplies are spread across three drawers and a shelf, so every box becomes a small search.
Now picture the opposite: a labeled cupboard of matching containers, stacked behind a closed door. It looks like the answer, yet it is often the problem. The supplies are hidden, above a child's reach, and arranged by size rather than by the order a lunch gets made.
This guide covers the physical side of lunch packing: where the station goes, how to divide it, which bins earn their keep, how a checklist helps children pack their own boxes, and how to keep food safe.
Why the counter beats the cupboard
A station works like a good kitchen layout: the next thing you need sits within reach of the thing in your hand. Open a door, move a stack, or cross the room, and packing slows until shortcuts appear. Shortcuts are how a box leaves with a sandwich and nothing else.
Place the station where lunch actually gets made: usually a stretch of counter near the refrigerator, beside where bags already land. In a small kitchen, a rimmed tray or a short rolling cart works too, as long as it stays on the morning route. Visible beats pretty.
Height decides who can use it without help. Adults work at normal counter height. A child needs a surface they can see into, usually the lower half of the counter or a pulled-out low drawer. If a child has to climb for a container, that child will wait for an adult instead of packing.
Lay out four reach zones
The most useful layout follows the order of the job. Moving left to right, or outward from the refrigerator, a child should be able to pick a box, add food, grab tools, and finish with a cold pack and a bag.
Zone one: boxes and bags. Stack containers and insulated bags at one end, keeping two or three sizes rather than a dozen. Zone two: food. On the counter, keep only shelf-stable items: bread, crackers, dried fruit, and the snack bin. In the refrigerator, clear one shelf at a child's eye level for lunch-ready food such as cut vegetables, cheese sticks, boiled eggs, and yogurt.
Zone three: tools. One cup or bin holds napkins, utensils, straws, a marker, and labels. This is the zone people forget. Zone four: the finish line. Ice packs, a spot for the filled bag, and the out-the-door basket sit at the far end. Ending with the cold pack matters, because it is the item most often forgotten.
Test the line before you commit: walk the route with an empty box. If you turn around, cross the kitchen, or open a cabinet mid-sequence, rearrange until the path runs one direction.
Bins and compartments that earn their space
The best bins are open, shallow, and clear. Open because a lid adds a decision. Shallow because small items sink and disappear in a deep bin. Clear because a child can see the contents without lifting anything. Four modest bins beat one elaborate organizer with twenty compartments.
Give each bin one job and label it in plain words: containers, dry snacks, tools, cold packs. If your family packs hot lunches, add a bin for thermoses and their parts. Resist creating a bin for every food; the station is a packing area, not a pantry.
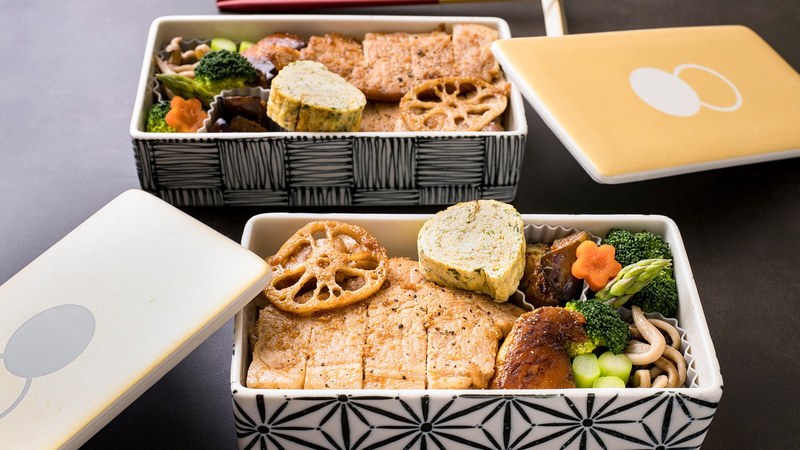
Inside the box, compartments do work a menu cannot. Three or four sections keep wet and dry foods apart and let a child see a complete lunch at a glance. A younger child does better with a fixed-section bento box, which has only one lid; an older child can manage a nesting set with fewer loose parts.
Keep the container count honest. Two boxes per child plus one spare is enough: one in the bag, one clean and ready, one in the wash. More than that, and Sunday disappears into matching lids. If you find a lid with no box, let it go.
| Setup | Counter tray | Low drawer | Open shelf unit | Rolling cart |
|---|---|---|---|---|
| Space needed | One tray's width | One wide drawer | Two shelves | Small floor corner |
| Child access | Good at a low counter | Excellent | Good if shelves are low | Excellent and movable |
| Morning speed | Fast | Fast once open | Fast | Fast, but it can wander |
| Cleanup | Lift the whole tray | Wipe the drawer | Wipe each shelf | Wipe the top only |
| Best for | Small kitchens | Families with young kids | Lunch plus pantry overflow | Shared or changing layouts |
Clear containers also show you when supplies run low. A snack bin with three bars left is a signal to restock, not a surprise on Thursday. The station should tell you what it needs before a child discovers the gap.
A checklist children can actually run
A checklist is the bridge between a nice station and a child who packs without an adult nearby. Keep it short, visual, and fixed. Five steps is plenty: choose a box, add the main, add a fruit or vegetable, add a snack, add a cold pack and close the bag. Post it at the child's eye level, laminate it, and add a picture beside each word for pre-readers.
Order matters more than wording. Put the steps in the same sequence as the physical zones, so the list and the counter lead in one direction. Put the cold pack second to last and the bag last, because those two items turn a packed lunch into one that leaves the house.
Children can take on different amounts by age. A four- or five-year-old can choose a snack while an adult handles the main and the cold pack. A seven- or eight-year-old can pack the whole box with an adult nearby. A ten- to twelve-year-old can run the checklist alone and confirm the bag is by the door.
Ownership changes behavior. A child who picked the snack is more likely to eat it, and a child who packed the box is more likely to bring the container home. Let each child choose one item at the store, then note what comes back untouched. A snack rejected three days running is information, not defiance; swap that slot and leave the routine alone. For a young child, mark foods that need an adult, anything to be cut, heated, or checked for choking risk.
The station is easier to stock when the week's dinners are already chosen. Use the planner above to build a seven-dinner frame from your family size and cooking preferences, then cook extra on purpose. Roast chicken on Monday becomes chicken and rice in Tuesday's box; taco night leaves beans and corn for a taco container later. Planning dinner and lunch together means the lunch shelf is never a guessing game.
Cold packs, thermoses, and safety that travels
A packed lunch can sit in a backpack for hours, so the station has to support temperature control, not just organization. Keep at least two reusable ice packs per lunch-packing child, stored flat in the freezer. A frozen water bottle works as both a cold pack and a drink.
Hot food needs a different habit. Fill a thermos with boiling water, let it stand a few minutes, pour the water out, then add the hot food and close it immediately. This works for soup, chili, pasta, and rice dishes. Hot food in an ordinary plastic container loses heat quickly and then sits where bacteria grow.
Refrigerator habits decide what is safe to pack. Cool leftovers in shallow containers, refrigerate them promptly, and pack them cold unless you are reheating for a thermos. Do not pack a portion that sat out through dinner. If you are unsure a food was handled safely, throw it out; a wasted portion is a smaller problem than a sick child.
Build simple rules into the station. Wash hands before packing. Keep raw meat and its juices away from ready-to-eat food. Wash fruit and vegetables eaten raw. Empty and wash boxes daily rather than letting them wait in a backpack.
A lunch station is not a storage project. It is a short, repeatable route that ends with food safe enough to leave the house.
Hard cheese, whole fruit, baked goods, canned tuna, and nut or seed butters tolerate a few hours at room temperature. Cut melon, soft cheese, deli meat, yogurt, and leftovers need a cold pack or insulated container. Follow your school's food and allergy policies, and if a child has a diagnosed allergy, use the school's written plan and your clinician's guidance rather than general advice.
Lunchbox Packing FAQ
How much counter space does a lunch station really need?
A rimmed tray about the size of a baking sheet holds the boxes, a snack bin, a tools cup, and two ice packs. The refrigerator shelf does the rest, and a tray lets you lift the whole station for cleaning.
How do we stop lids and containers from disappearing?
Keep one container per child plus a spare, store each lid on its box, and retire unmatched pieces instead of saving them. Fewer, matched containers are easier to maintain than a drawer of parts that almost fit.
What if my child refuses to pack their own lunch?
Start with one slot, usually the snack, and let the child own that decision completely. Add a second job only when the first is reliable. Ownership grows from a small, real choice, not from a chart that assigns the whole task at once.
Can the station live inside the refrigerator?
Partly. A dedicated lunch shelf holds the perishable items, but containers, tools, and cold packs should stay on the counter where children can reach them. Splitting by temperature keeps the route short and the food cold.
Start with one change tonight: clear a tray's worth of counter between the refrigerator and the door and put four labeled bins on it. Add the checklist tomorrow, at your child's height, and let them pack the snack slot for a week. Then use the Weekly Family Meal Plan Generator before the next shop so planned dinners leave planned leftovers for the box.
For more dinner and lunch structures that fit real schedules, browse the Family Meals section, and keep the meal plan generator handy for the Sunday reset.
Priya Patel is a recipe developer and meal-planning writer with a focus on weeknight dinners, school lunches, and grocery budgets that work for real families. She keeps ingredient lists short, uses equipment most kitchens already have, and writes for cooks who are short on time.